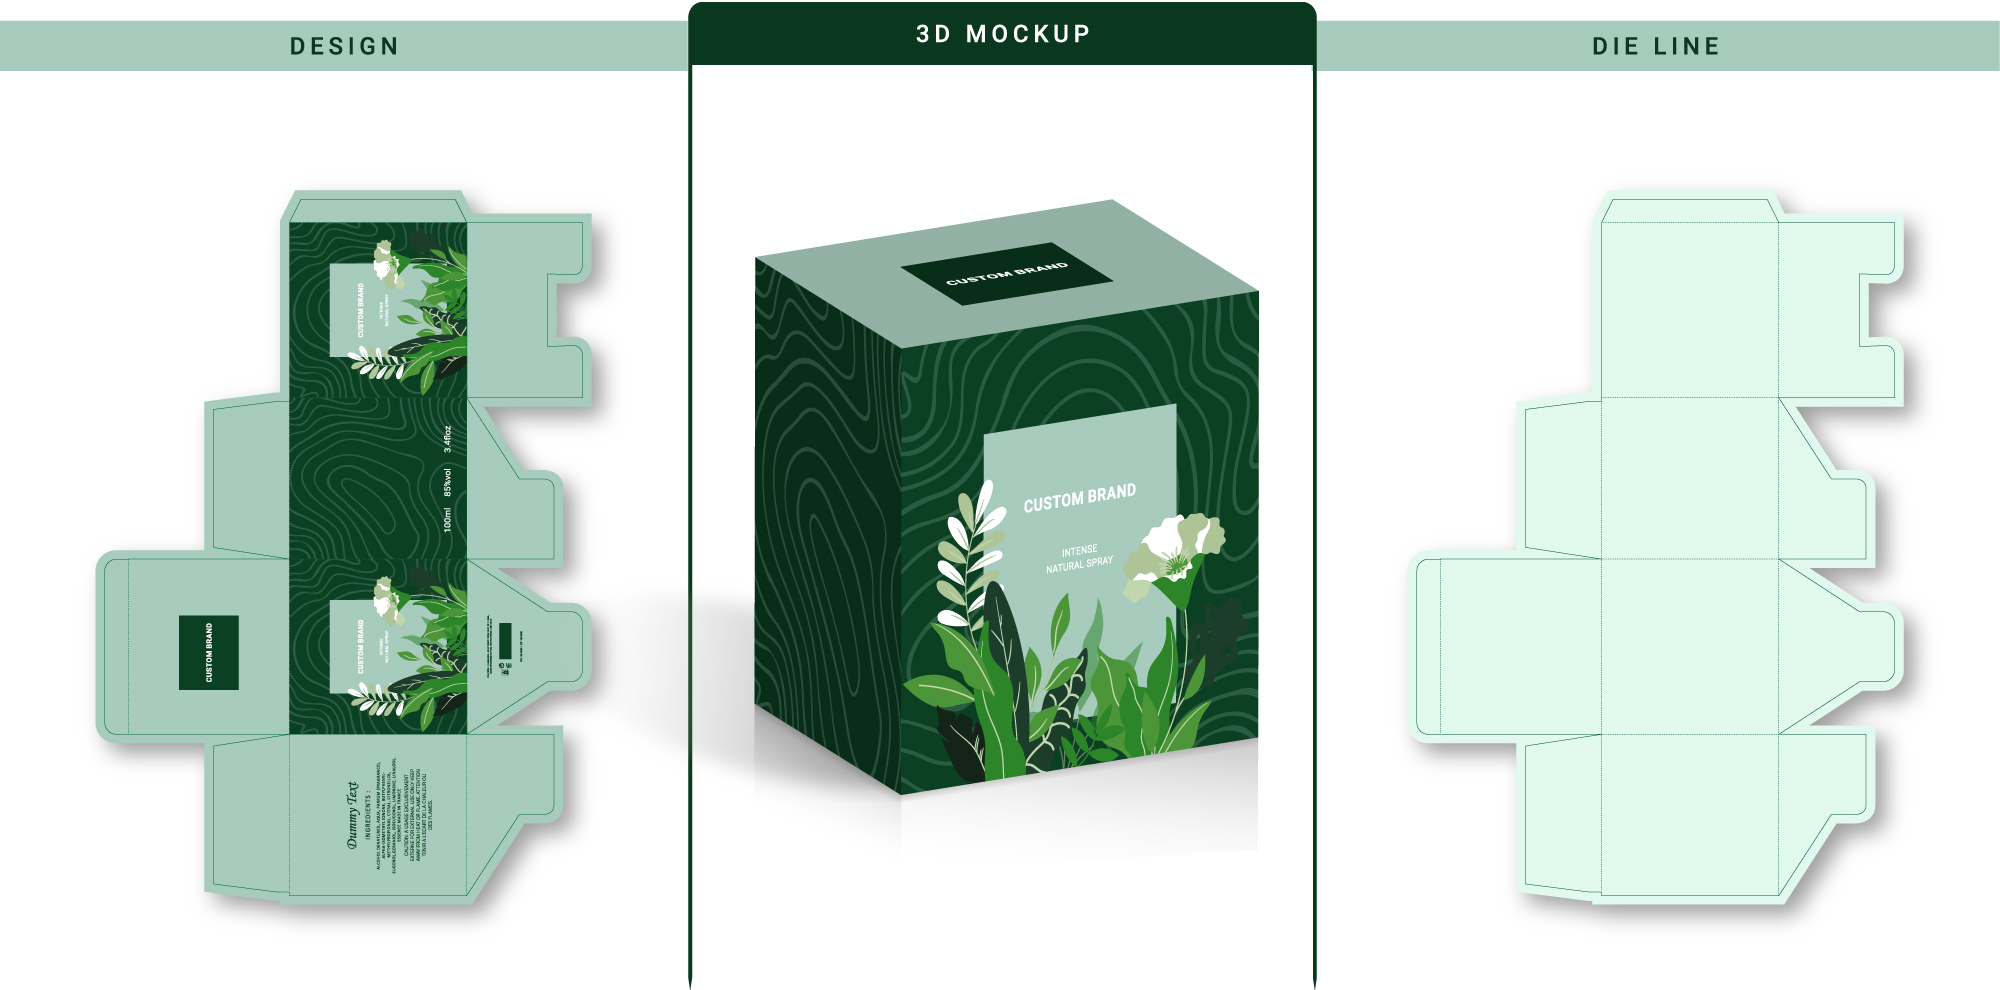
Elevate Your Brand with Unique Die-Cut Boxes

Die-cut boxes are a popular choice in the world of packaging as they offer a unique blend of aesthetic appeal and functional design. However, you may wonder if they’re the right packaging solution for your cannabis brand.
In this article, we’ll explore how you can get creative with die-cut, enhancing both the unboxing experience and the visual branding of your products.
What is a Die-Cut Box?
Die-cut boxes are custom-made packaging solutions, tailored to fit specific dimensions and protection needs.
These boxes are cut from flat sheets of material using a die; a specialized tool crafted to cut and score cardboard in a predefined design. This process allows for intricate cutouts, windows, and unique box shapes that are unachievable with standard box-making techniques.
Benefits of the Die-Cut Box
A die-cut box template offers several compelling advantages for businesses and designers alike:
- Customization – The ability to fully customize a box’s shape, size, and features.
- Protection – Enhanced protection due to the precise fit around the product.
- Aesthetics – Attractive and distinctive designs that stand out on shelves and in customers’ hands.
Designing Your Die-Cut Box
Creating a die-cut box design that perfectly matches your vision involves several steps:
- Understanding Your Needs – Start by defining your box’s purpose. Consider the product’s dimensions and weight and how the box will be used during shipping and retail display.
- Choose the Right Material – Select materials that will protect your product and align with your brand’s sustainability ethos. Cardboard, corrugated fiberboard, and recyclable plastics are popular choices.
- Customization Techniques – Leverage techniques (i.e. digital or offset printing, embossing, debossing, and window patching) to add branding elements and decorative features.
- Add Unique Features – Think beyond the box. Literally. Add handles for easy carrying, innovative closures for repeated use, or die-cut window patterns that give a peek of the product inside.
Creative Uses of Die-Cut Boxes
Custom die-cut boxes are adaptable for a multitude of applications across various industries:
- Retail Packaging – Create packages that protect merchandise and enhance shelf presence with custom shapes and designs.
- Wholesale Boxes – Easily create wholesale master boxes to coordinate branding between retail and wholesale packaging.
- Subscription Boxes – Offer subscribers a unique unboxing experience every time, with designs that evolve with themes or seasons.
- Eco-Friendly Solutions – Design your boxes with sustainable materials and processes to appeal to eco-conscious consumers.
Marketing Benefits
Innovative packaging can significantly boost your product’s visibility and brand recognition. They make your product stand out in a crowded market, and the unique design can turn ordinary packaging into a powerful marketing tool.
Die-cut boxes are more than just containers; they’re critical to product presentation and brand perception. Furthermore, by getting creative with your design, you can deliver an unforgettable unboxing experience and establish a strong visual identity.
Not sure where to begin? Custom 420 has a die-cut box machine for the purpose of offering such solutions to brands like yours. We invite you to reach out through our contact form to learn more.
Frequently Asked Questions
The process of assembling a die-cut box is easy. Die-cut boxes are produced as flat cardboard with all the fold and score lines intact after production. The most popular style of die-cut box is a fold-and-tuck box which is easily assembled by folding and tucking the cardboard in the shape of the die lines to form your box.
Die-cut boxes are one of the most cost-effective box options on the market. The price of your die-cut box will be determined by the size, thickness, and quantity of your box. Other factors that help determine the cost are the need for features like glue strips or windows.
To make die-cut lines in Illustrator, you’ll want to follow these steps:
1.) Open your design in Illustrator.
2.) Go to Select > All.
3.) Go to Object > Group.
4.) Go to Edit > Copy and then to Edit > Paste in Place.
5.) Go to Window > Pathfinder and press the “unite” icon.
6.) Go to Object > Path > Offset Path.
7.) Choose the initial shape and remove it.
8.) Select the offset path you just created and in the Swatches panel (Window > Swatches), set the fill to “none.”
9.) Click on the Stroke icon to activate the stroke color, then set it to “CMYK Cyan” (or another color).
